4. Installing a Connect iT thumb appliance #
A Connect iT thumb appliance has only one purpose, to generate thumbnails. If thumbnailing is enabled for an input that stream will be sent to a thumbnail appliance in the same region. In the case of this tutorial we will only install one thumb appliance and thus all thumbnailing will happen on that system.
A thumb appliance should be the only thing running on a system. If it is run on a virtual machine the VM needs to have resources dedicated to it, as is most often the case in public cloud providers for example. For instance a thumb appliance should not run on the same system as a video appliance or Connect iT core. Co-locating the different components on the same system is strongly discouraged but for this tutorial we will make an exception.
You will likely recognize most of this section as installing a thumb appliance is very similar to installing a video appliance like we did in the previous section.
4.1 Installing the thumb appliance #
To install a thumb appliance you need the domain of Connect iT core (from the Install Connect iT Core section) and the
admin password, much as what is required for a video appliance. You will also need to decide on a name for the
appliance, in this tutorial we will simply call it thumb-1.
Appliances can be part of different regions. This is a way for you to organize your Connect iT system for redundancy and
to manage a global network. You can specify the region of an appliance with the --region flag. In this tutorial we
will not be specifying the region which means they will all end up in the main region.
sudo ./connectit install thumb --url https://<domain> --name thumb-1
If you get
toomanyrequestserrors, try login to Docker Hub.sudo docker login
4.2 Find the appliance in the Network Manager #
Once the appliance has started it will register itself with the Connect iT core system. It will then be visible under
Appliances under ⚙ Settings.
Navigate to ⚙ Settings → Appliances and ensure the status of the appliance is green:
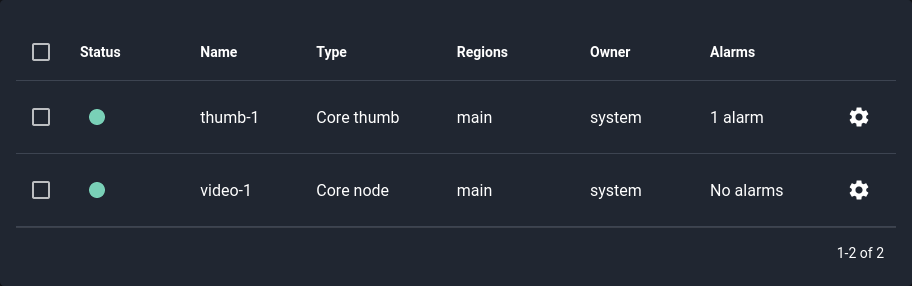
Depending on the setup the Alarms column might indicate that there is 1 active alarm such as in the screenshot above.
If so a pop up should also appear:

Alarms are used to indicate there is something wrong with the system that needs to be addressed. You can view all alarms
by pressing the Alarms link in the menu. If there is active alarms it is shown in the menu as well:

See how to fix public ip mapping alarm for information on how to resolve this particular alarm.