How to configure WireGuard VPN between two appliances #
This how-to walks through setting up an encrypted WireGuard VPN tunnel between two EdgeOS appliances so that traffic can flow securely between their networks.
1. Configure the appliances #
1.1 Open the VPN settings page #
In the appliance UI navigate to Network → VPN.
1.2 Enable WireGuard and configure the interface #
Toggle Enable WireGuard VPN on, then fill in:
| Field | Example value | Notes |
|---|---|---|
| Tunnel Address (CIDR) | 10.99.0.1/24 |
The IP address for the wg0 interface on this appliance. Must be unique across the tunnel. |
| Listen Port | 51820 |
UDP port WireGuard listens on. The default is usually fine. |
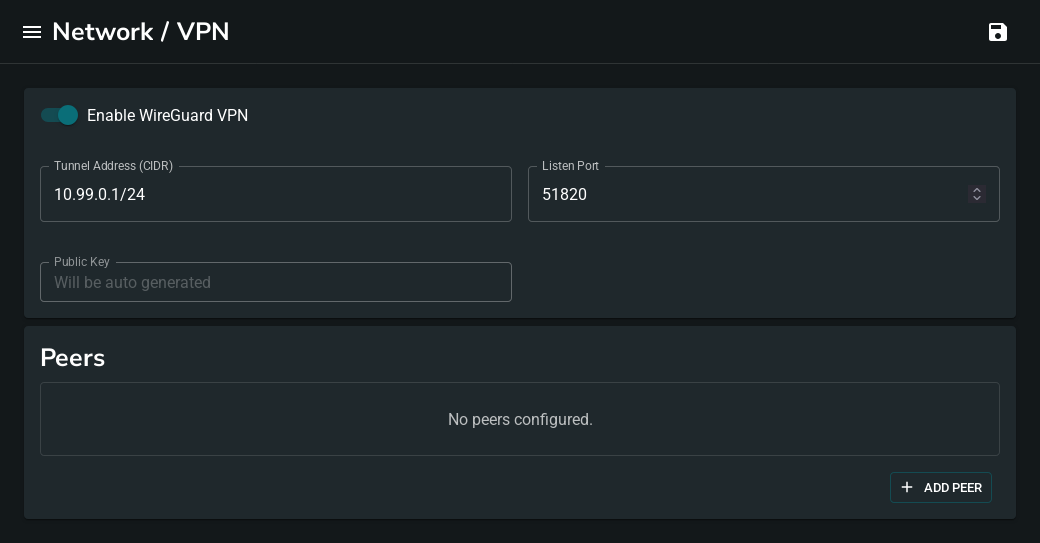
1.3 Save to generate a keypair #
Click Save & Apply (💾) in the top right. A keypair is generated automatically and the Public Key field is populated.
1.4 Repeat on Appliance B #
Follow the same steps on the second appliance, using 10.99.0.2/24 as the tunnel address.
2. Add peers #
Each appliance must have the other listed as a peer.
2.1 Add Appliance B as a peer on Appliance A #
Back in Appliance A’s VPN settings, click Add Peer in the Peers section and fill in:
| Field | Value |
|---|---|
| Public Key | Copy Appliance B’s Public Key |
| Endpoint (optional) | <appliance-b-ip>:51820 |
| Allowed IPs | 10.99.0.2/32 |
| Persistent Keepalive | 25 |
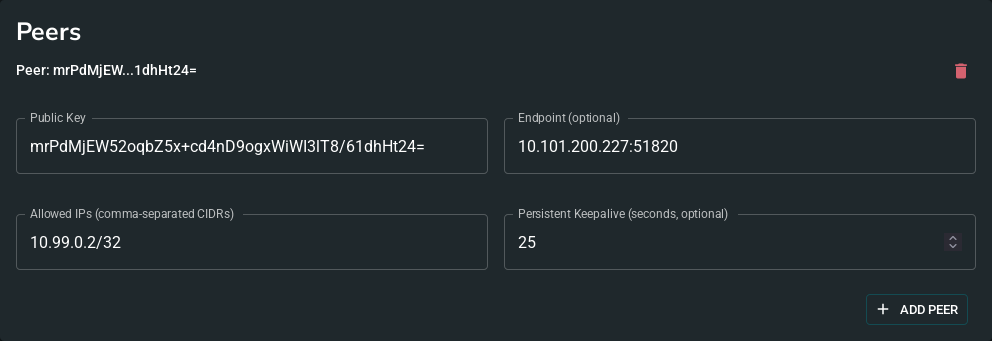
At least one side must have the other’s Endpoint configured so the tunnel can be initiated. If one appliance is behind NAT, set the endpoint only on the NAT side and rely on Persistent Keepalive to keep the tunnel alive.
Avoid setting Allowed IPs to 0.0.0.0/0 unless the peer is configured to act as a gateway with NAT. Doing so routes all traffic through the tunnel, which will break connectivity to the appliance if the peer does not forward and NAT the traffic correctly.
2.2 Add Appliance A as a peer on Appliance B #
On Appliance B, click Add Peer and fill in the mirror configuration:
| Field | Value |
|---|---|
| Public Key | Copy Appliance A’s Public Key |
| Endpoint (optional) | <appliance-a-ip>:51820 |
| Allowed IPs | 10.99.0.1/32 |
| Persistent Keepalive | 25 |
3. Save and verify #
Click Save & Apply on Appliance A, then on Appliance B.
After a few seconds the Status section will appear at the bottom of the page showing the active interface and a peer table. A green dot next to the Latest Handshake column means the tunnel is up and traffic is flowing.

Alternative using wg-quick #
If one peer is a Linux machine running wg-quick rather than EdgeOS, use the following configuration instead.
Generate a keypair on the Linux machine:
wg genkey | tee /etc/wireguard/privatekey | wg pubkey > /etc/wireguard/publickey
Share the public key in /etc/wireguard/publickey with the EdgeOS admin — it goes into the Public Key field in step 2.1
.
Create /etc/wireguard/wg0.conf, substituting the EdgeOS appliance’s public key (from its Public Key field) and IP address:
[Interface]
Address = 10.99.0.2/24
PrivateKey = <contents of /etc/wireguard/privatekey>
ListenPort = 51820

[Peer]
PublicKey = <edgeos-public-key>
Endpoint = <edgeos-ip>:51820
AllowedIPs = 10.99.0.1/32
PersistentKeepalive = 25
Bring the interface up:
sudo wg-quick up wg0